Get in Touch with Saiweiglass

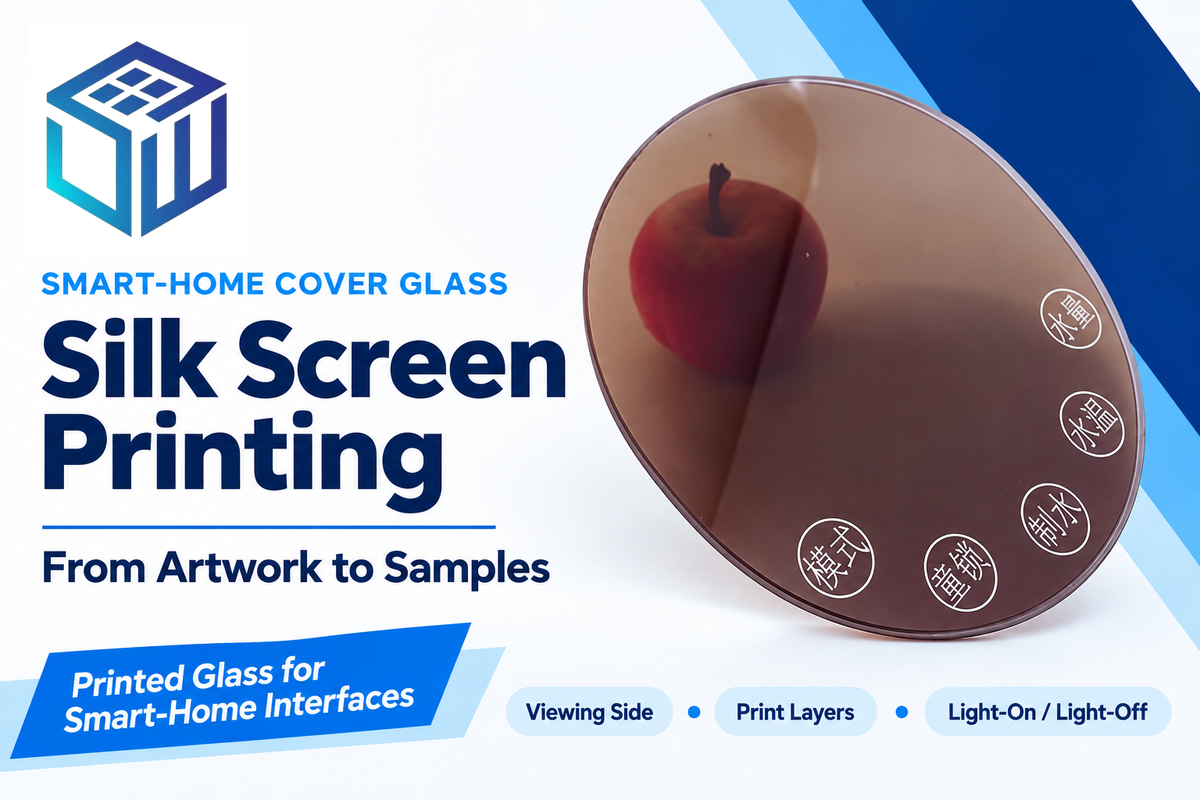
Silk screen printing on glass moves ink through a patterned mesh screen onto a glass surface. The stencil defines the image; ink and curing determine how that image bonds and performs. For a smart-home panel, the printed image may also cover up LEDs, frame a display or let a symbol glow.
Start with five artwork checks. Check the viewing side. Check registration, color, light transmission and layer order. The logo may appear correct on a flat proof. But an illuminated icon may not appear correct in the finished device. For smart-home glass panels, this guide follows those differences from the printing process to sample approval and revision costs.
Silk Screen Printing on Glass: Process and Uses
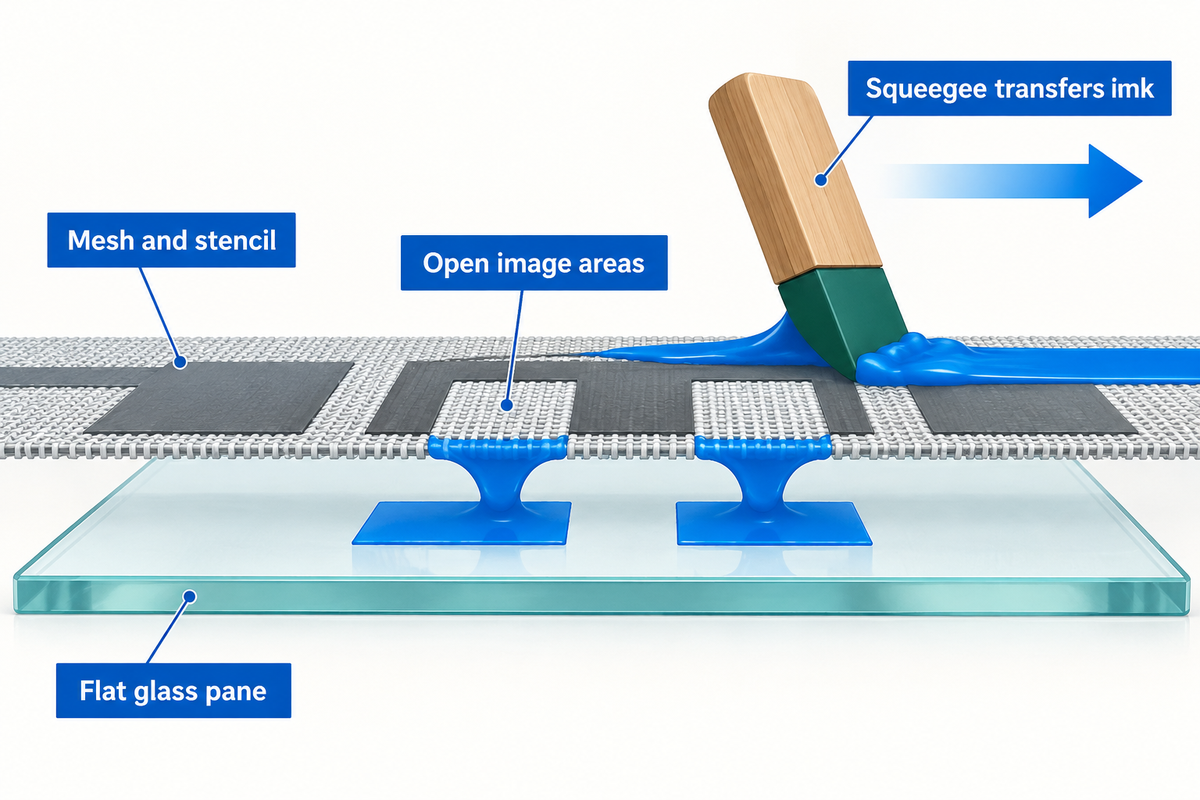
OSHA describes the silk screen printing process in its screen-printing overview. In a photographic stencil used in silk screen printing, exposed photosensitive emulsion hardens; washing away unhardened emulsion leaves open areas for the image. Mesh count and the construction of silk screen stencils affect the deposit, so a fine mesh screen is more of a process choice than a definitive specification. Match the materials and equipment to the ink supplier’s processing instructions. A squeegee is used to transfer ink applied to the screen through those openings.
Shaped equipment is needed for bottles. A flat glass pane needs positioning appropriate to a flat part. Glass panels used in home appliances provide windows, masks and symbols that are aligned with components situated behind them. For wider industrial applications, see our industrial glass printing guide.
What printer can I use to print on glass?
For a wall switch with a repeated solid design, a screen printer is suitable; frequently changing photographic designs and other custom designs warrant a comparison with a digital printer.
Glass Printing Ink: Ceramic, Organic and UV Routes
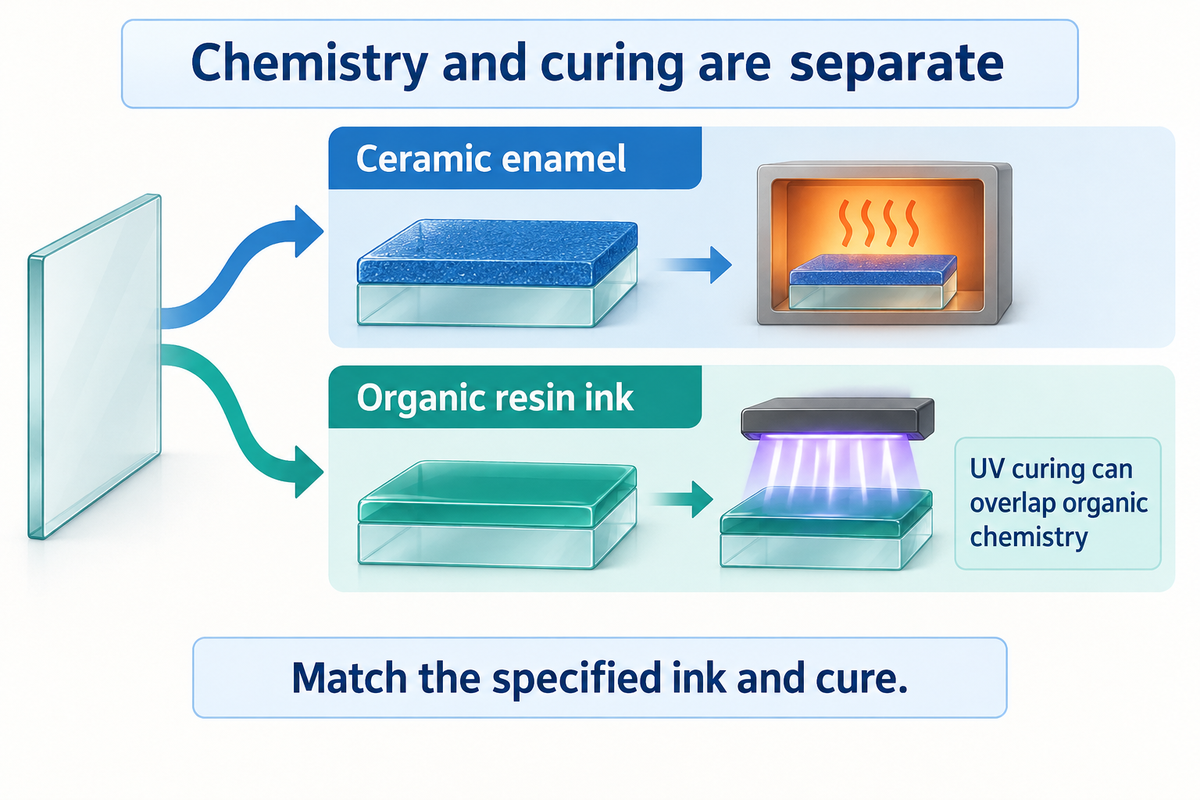
The type of ink must suit the intended service, curing route and chemistry. Ceramic enamel uses a glass-based phase which is fired; organic inks use a polymer. The UV cure overlaps with organic chemistry. Treating organic, ceramic and UV as three entirely different systems leads to very poor comparisons.
| System or route | What forms the print | What the specification must settle |
|---|---|---|
| Ceramic enamel | Frit and pigment form the fired decoration | Compatible glass, firing sequence and finished appearance |
| Organic resin ink | A polymer film carries the color | Surface preparation, mixing if applicable, cure and service exposure |
| UV or UV-LED curing | A radiation-curable formulation hardens under suitable UV light | Ink chemistry, lamp compatibility and any secondary cure |
The Ceramic Industry’s explanation of enamel frits refers to an organic application medium that burns out during firing. Its presence doesn’t make the completed enamel an organic resin coating. The frit must soften and fuse in the intended process; a generic high-temperature or kiln recipe can’t be transferred between glass products.
This works both ways. There’s a published SAE study describing an organic glass coating with UV crosslinking and a secondary moisture cure. This is a specific case, and not a prerequisite for all UV inks. Direct UV-curable screen printing on glass is also mentioned in the EPA’s historical Envirogluv account.
What ink do you use to screen print on glass?
Use the screen printing ink specified for the actual type of glass, its surface treatment and the finished application. A low-temperature organic system and a fired enamel may both print glass, but their production sequences differ. Record the ink used by product name and cure schedule, along with water-based or UV labels.
Printing doesn’t temper or toughen a pane by itself. Keep the decoration sequence compatible with any strengthening process, and state safety glass separately if required. Food safe suitability also requires its own application assessment; color, hardness and adhesion can’t prove it.
Screen Printing vs Digital Printing on Glass
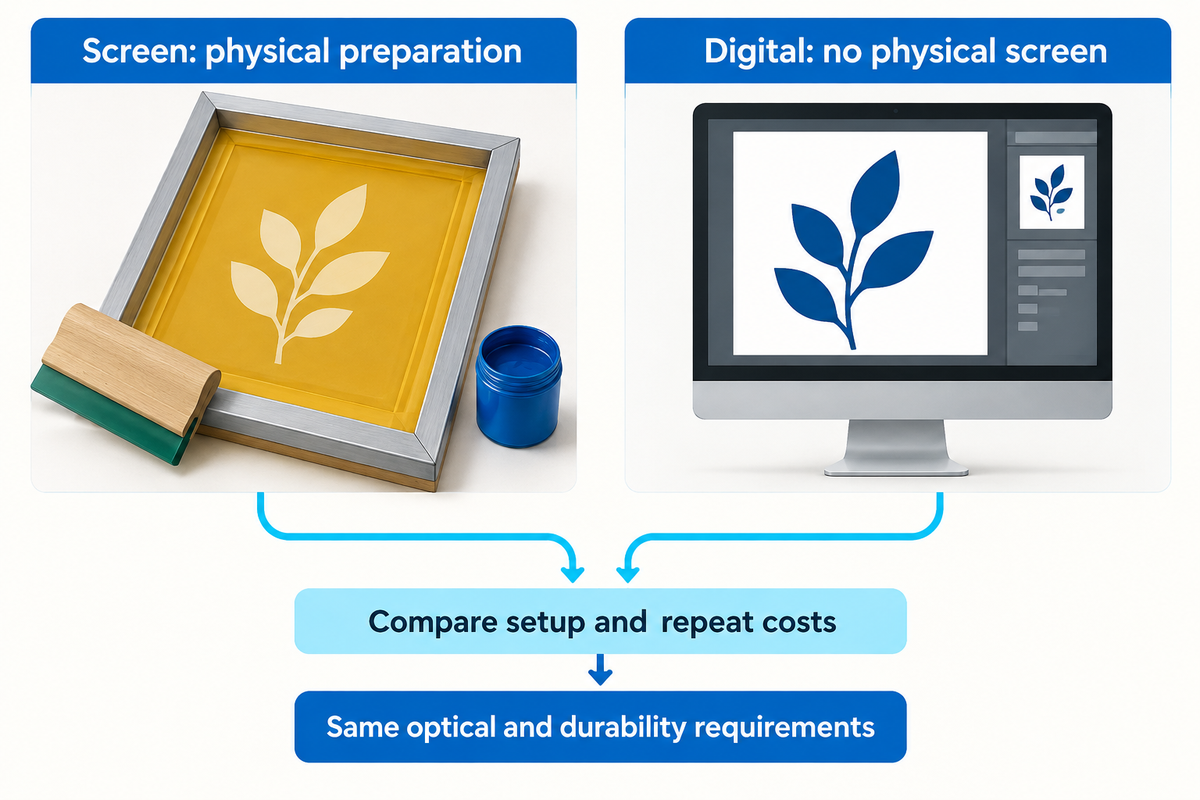
Screen and digital printing should both be assessed against the same requirements for glass, opacity, transmission and durability. An image applied by a decorative process and a backlit interface are different purchases.
A flat-glass comparison in Screen Printing magazine identifies the prepress difference: inkjet avoids the use of physical screens and their associated preparation. Consider setup and repeat-production costs when selecting a process. An appliance graphic that frequently changes and an opaque thermostat mask place different demands on the printing and digital workflow.
Glass Screen Printing Artwork: Views, Colors and Layers
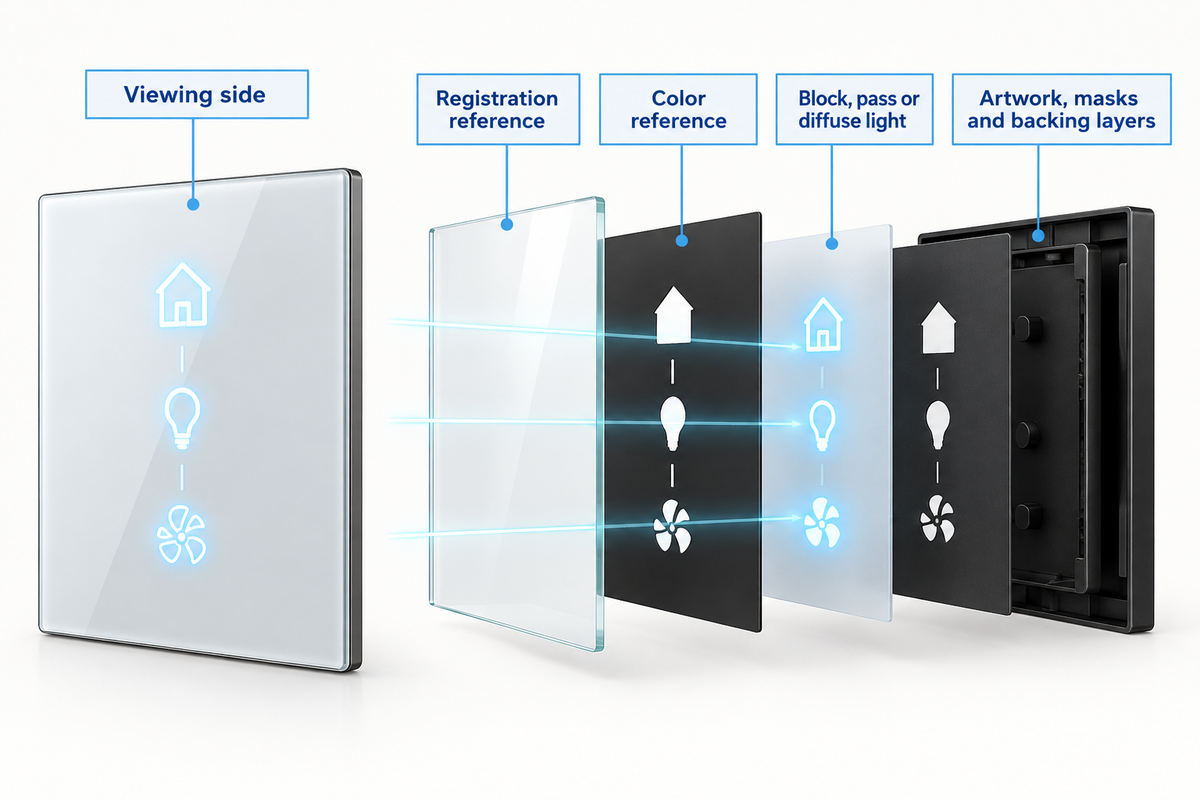
Distinguish the customer’s viewing image from the production layer files. Identify what the customer sees, where the ink sits, and how printed features are aligned to the glass outline. What function does that area serve? Is it a visible color, opaque mask, translucent icon, or a clear window? The function of that area in the overall construction determines what a particular sample needs to demonstrate.
- Label front and rear views. Rear-printed lettering must read correctly through the glass.
- Locate icons and windows from agreed features rather than the edge of a cropped artwork image.
- Identify the color reference and whether comparison is through glass or directly against the printed face.
- Mark areas intended to block, pass or diffuse light.
- Distinguish the visible artwork from supporting masks and backing layers.
A black wall-switch logo and a black light-blocking border may appear identical in a PDF, but they can serve different functions. Conversely, a single illuminated symbol can be constructed with multiple layers. A Corning deadfronted-glass patent shows construction with semi transparent, contrast and opaque layers, and illustrates that visible color alone doesn’t describe the entire construction.
To create custom artwork, separate the different patterns by function before approval. For general drawing completeness, refer to the cover-glass drawing checklist. The artwork should be next to that drawing. A technician should be able to match a window in the file to the same window on the sample without guessing the viewing direction.
Dead-Front Printing: Balance Hidden Icons and Backlighting
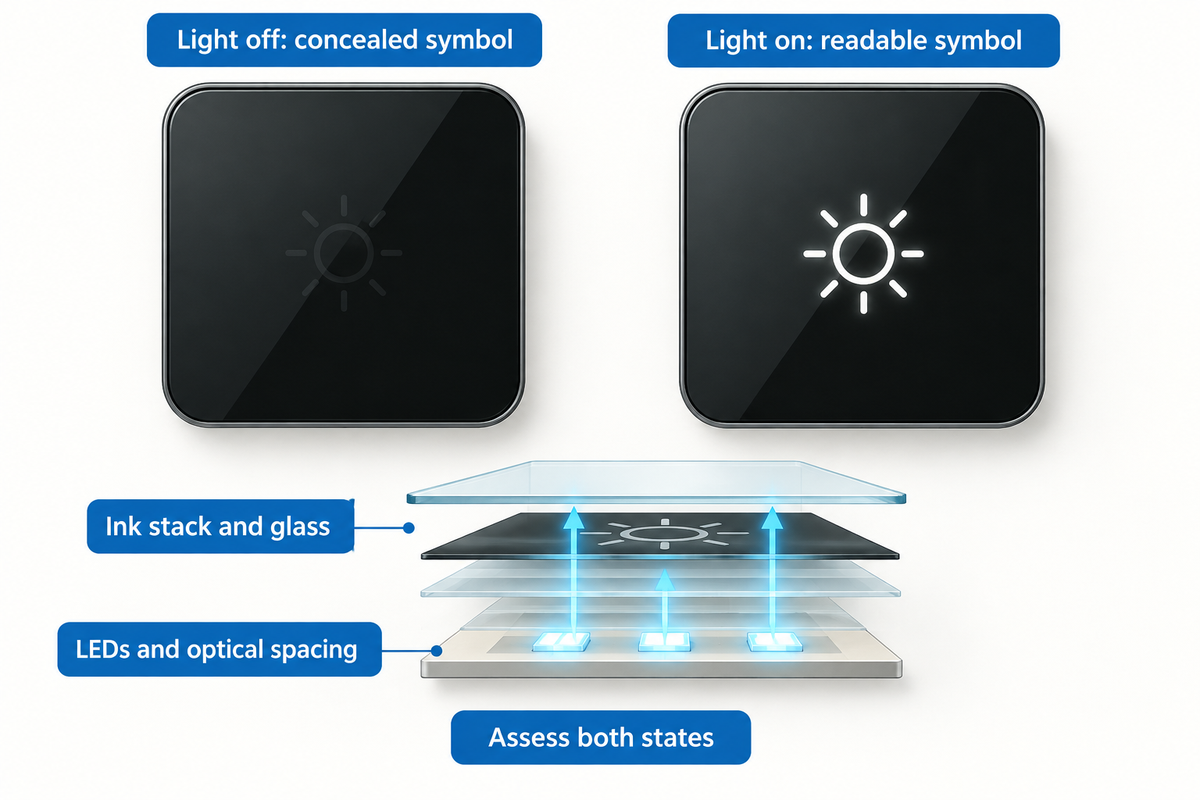
Dead-front printing conceals selected symbols against a dark background when their lighting is off and reveals them when illuminated. The result depends on the ink stack, glass, LEDs and optical spacing together. A darker icon can disappear more convincingly when off and become harder to read when on; consider both states when assessing the assembly.
Imagine a thermostat where the temperature symbol must disappear into a dark face when unlit. Changing only the icon ink may alter its unlit contrast, and changing the LED or diffuser may alter its lit contrast. The descriptions of “semitransparent” and “opaque” regions of the same Corning dead-fronted glass patent can be used to think of the opposing optical functions.
Optical density concerns light blocking; electrical resistance concerns current flow. When considering color matches for our silk screen printing capability for a custom panel, check the match under the intended colored LED lighting as well as room lighting, because transmission through the print can differ between the two.
Before modifying the print, hold LED settings and diffuser arrangements steady. Evaluate icon vibrancy under the same lighting rather than increasing LED output between samples. If the assembled sample is the only sample showing a bright spot, assess lighting geometry. Symptoms may not be attributable to ink coverage.
Glass Print Inspection: Compare Light-On and Light-Off Samples
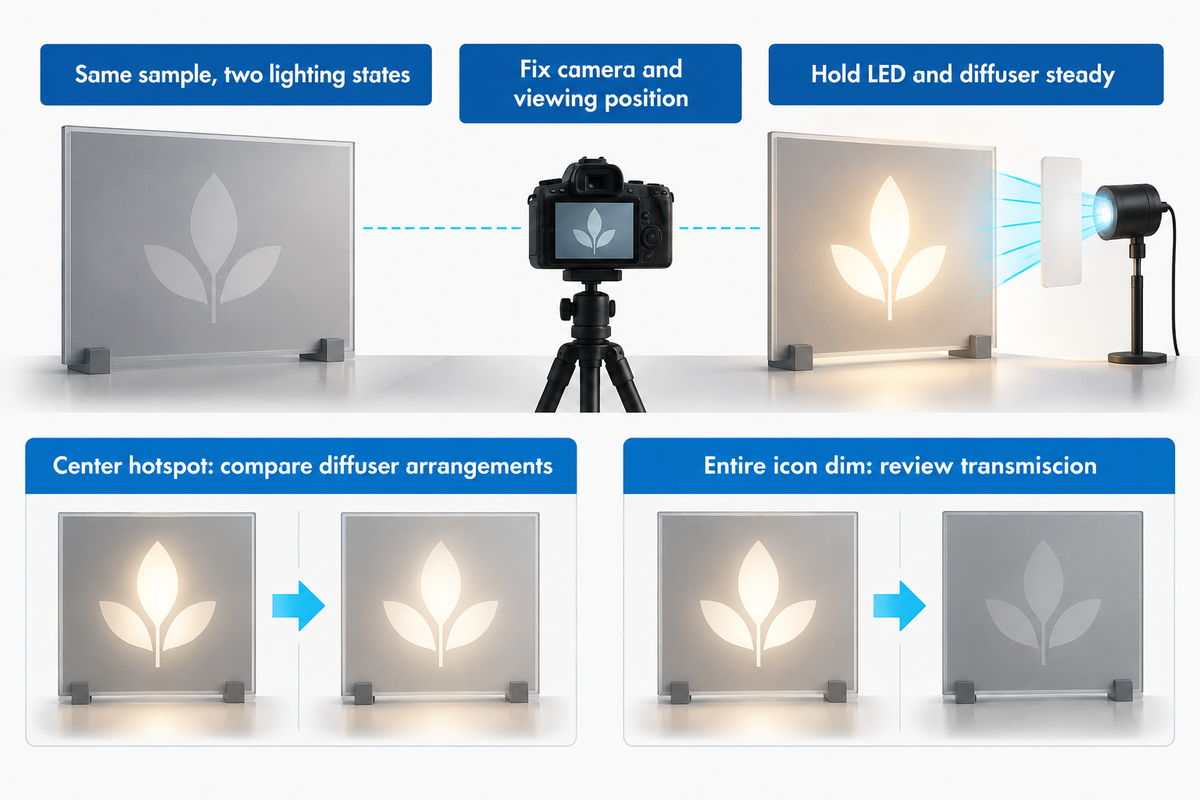
Inspect each backlit sample twice: lighting off, then lighting on, with the assembly and viewing conditions held steady. Record the symptom and next comparison to be evaluated beside the pair. This maintains the clarity of the appearance standard and prevents a different LED setting or ambient light from disguising a printing change.
Use the same sample, LED drive, diffuser, camera settings and viewing position for each pair. Begin at the intended installation lighting and usual user viewpoint; add other agreed conditions afterward. IEC 62977-2-2:2020 addresses illumination geometry, levels and spectra for electronic-display optical measurements. Those variables are useful here, although this visual review is not an IEC qualification test.
| Observation area | Light off | Light on | Next comparison |
|---|---|---|---|
| Window edge | Check border position | Look for edge leakage | Overlay artwork and component position |
| Icon fill | Check concealment | Check readable fill | Compare the same icon and LED setting |
| Adjacent zone | Check background match | Look for unintended glow | Inspect the mask boundary |
| Mask area | Look for visible defects | Look for bright points | Compare under magnification and backlight |
| Small text | Check edge definition | Check strokes remain distinct | Compare artwork size and registration |
| Diffuser area | Check visible patchiness | Look for hotspots | Compare diffuser position and spacing |
| Viewing angle | Check icon visibility | Check readability | Repeat at the same marked viewpoints |
| Ambient change | Check concealment in room light | Check contrast in that same light | Change ambient conditions alone |
| Cleaned comparison | Look for surface change | Check altered light leakage | Compare with an unexposed reference |
An icon hidden when off but bright only at its center may require an optical stack comparison. Keep print samples the same and compare diffuser arrangements first. If the entire icon is dim under the agreed-upon lighting setup, review its transmission with the print supplier. These are different revision paths.
Reach an agreement on an appearance reference before placing an order for a batch. Subsequent batch acceptance requires a sampling plan distinct from the appearance reference used to approve a sample. The NIST acceptance-sampling explanation distinguishes deciding whether to accept a lot from estimating its quality; for this panel review, one attractive prototype doesn’t define how production lots will be sampled.
Glass Printing Defects: Pinholes, Edges and Color Shifts
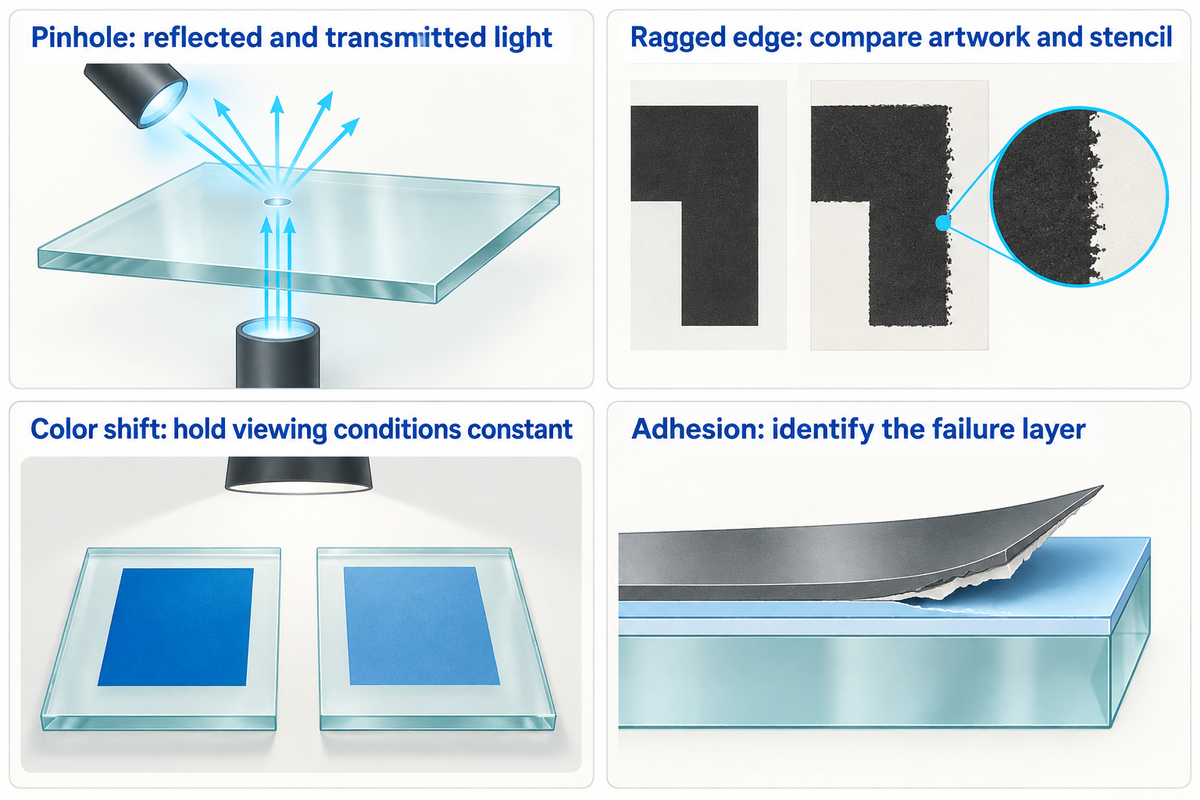
The appearance of a defect may be understood without knowing its root cause. A bright point may represent a mask opening; a weak edge may involve artwork, registration or deposit quality. Color can shift with the glass and the viewing conditions. Compare the defect with an approved sample before changing the process.
“This procedure is not, however, a means of measuring adhesion.”
- For pinholes, compare reflected and transmitted light, then locate the opening within the mask or stack.
- Compare a ragged edge with the original artwork and stencil before changing a nominal line width.
- Hold the glass, background, illumination and viewing side constant when investigating color shifts.
- Poor adhesion calls for checking substrate preparation, any contaminant, ink compatibility, mixing and cure against the selected system.
Measurement equipment can introduce error. NIST’s work on character contrast describes veiling glare in measurements of small dark regions surrounded by a bright region. If a measurement disagrees with a comparison, review the measurement geometry before concluding that the mask has been changed.
In the case of durable prints, connect the chosen checks to the cleaning exposure and environmental factors using a cover-glass testing plan. A process that makes ink adhere to the glass surface still needs the required exposure and appearance criteria for the device.
Glass Screen Printing Cost: Samples, Revisions and Quantity
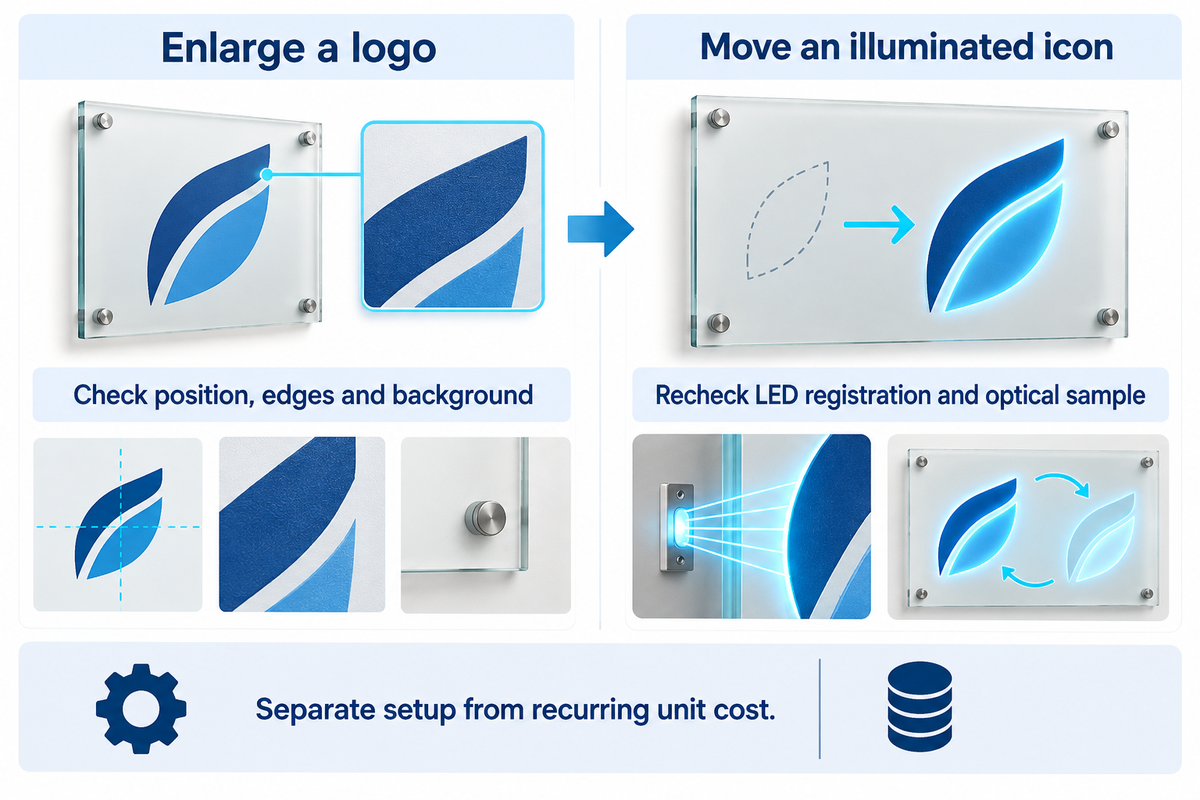
Separate cost into setup and repetitive production. Quantity can spread setup across more parts and an artwork change can reopen preparation and sample approval. For illuminated panels, the main surprise is often a change to the optical stack behind a simple looking graphic.
How much does silk screen printing cost?
A quote has one-time setup and sample costs plus a per-part production cost, so a larger quantity spreads the setup across more parts. Compare quotes for the same glass dimensions and functional requirements, with screens, print layers, inspection and repeat-order charges itemized. The prepress difference between screen and digital printing explains the effect of artwork changes on setup costs.
| Requested change | Potentially affected function | Sample recheck |
|---|---|---|
| Enlarge a logo | Visible graphic; backing if used | Position, edge quality and background |
| Move an icon | Translucent icon and mask opening | Registration to the LED or light guide |
| Change a visible color | Color layer and interaction with backing | Appearance through the chosen glass |
| Add dead-front behavior | Transmission and background matching | Both unlit concealment and lit readability |
| Increase mask density | Light blocking and deposit construction | Leakage, edges and adjacent features |
| Resize a clear window | Mask boundary and display alignment | Visible display area and edge leakage |
| Change the glass tint | Apparent color and transmitted light | All visible and illuminated regions |
| Change LED color | Illuminated appearance through the stack | Icon color and contrast |
| Change the diffuser | Light distribution behind the print | Hotspots and uniformity |
These interdependencies don’t predetermine the number of print passes. A supplier can combine or separate functions according to its ink and process. Production can identify affected operations using the map; procurement can request a revision breakdown; finance can distinguish a new setup from a recurring unit cost.
Consider an appliance panel in which the logo increases in size while the illuminated symbols remain the same. The visible changes to the art may be restricted. Move a symbol over a different LED position, however, and the same file-edit time can lead to another optical sample loop. Compare the revised scope before comparing the revised price.
Smart-Home Glass: From Approved Sample to Order
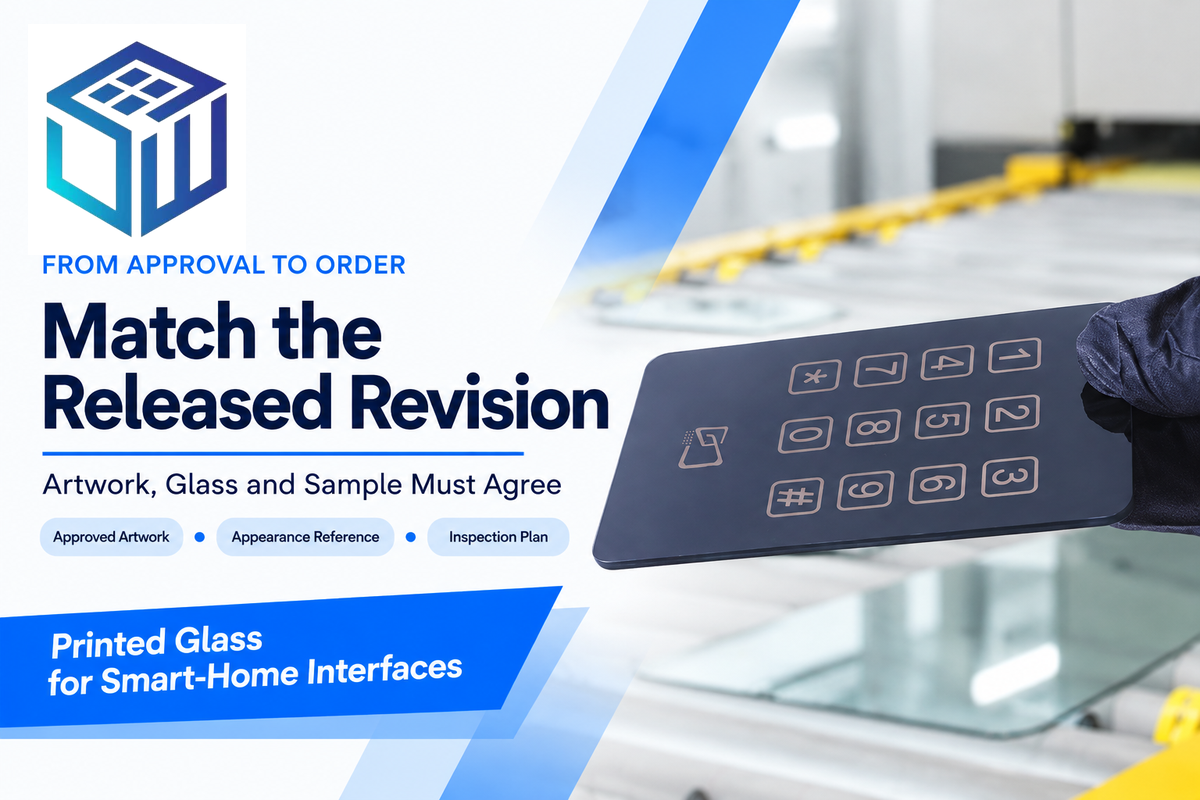
Release an order when the approved artwork, glass specification, and sample observations describe the same panel. Identify the accepted revision and use the reference against which the appearance checks were made. For designs using backlighting, also explain the arrangement of lights used to generate the approval.
Quality assurance needs the released artwork along with the agreed appearance reference and inspection plan. Customer requirements must be made observable on those records. The NIST distinction between a sample and a lot-acceptance decision explains why those records serve different purposes. A purchasing signature on a prototype shouldn’t leave production inspection undefined.
The SW Glass process allows the production of cover glass for electronic and electrical devices. For a smart-home glass panel, send the intended front view, print-layer artwork and the required light-on/light-off behavior with your drawing. Our quality inspection capability is a starting point for understanding the design and artwork associated with that product.
Discuss your printed glass panel
FAQ
Can screen printing be done on glass?
Yes. Screen printing transfers ink through a stencil onto glass, including flat panels and curved vessels when the equipment suits the part. The surface preparation, ink and cure must suit the glass product and its use. OSHA describes the underlying stencil-and-squeegee process; the application determines the additional material and inspection requirements.
How to permanently print on glass?
Use a glass-compatible ink and complete its specified preparation and curing process, then evaluate the print against its intended exposure. Fired enamel and suitable organic systems offer different routes. “Permanent” is too broad to specify resistance to every cleaner, scratch or environment. Define those exposures separately, and use an appropriate test with a stated acceptance criterion.
Can you press DTF onto glass?
UV-DTF transfers can decorate glass, but they’re different from textile DTF transfers applied with a heat press. UV-DTF forms an image on a transfer film and applies it to the object as a transfer layer. Choose the transfer system for the glass and use; don’t carry a fabric heat-press recipe over to a finished glass panel.
Is silk screen printing different from screen printing?
No. Silk-screen printing is the same stencil printing technique. Modern silkscreen printing need not use silk meshes, although the historical name remains.
How many colors can you screen print on glass?
Several: Screen Printing magazine lists single-color and multicolored designs, and four-color process graphics, among the designs glass screen printing can apply. Available equipment, registration, ink compatibility and processing steps determine the practical design. Count the functional layers as well as the visible colors: a clear window, opaque border and translucent icon can change the construction even on a panel that appears monochrome. The published Corning deadfronted-glass layer arrangements illustrate that distinction. For a quote, send the complete artwork and mark each area’s optical function so the printer can propose the actual sequence.
Can screen printing on glass be repaired?
Sometimes, but a local touch-up can look different or disturb a functional layer. Compare repair with replacement using the same inspection criteria. The ink, cure and defect determine the available route; don’t approve a cosmetic improvement that leaves an illuminated defect.
Why is a printed icon visible when its light is off?
The icon may contrast with the surrounding mask under ambient light because of its ink, backing, glass or optical stack. Compare it with the approved sample using the same viewing angle and room lighting, then change one variable at a time. Increasing darkness alone may reduce illuminated readability. The illumination variables addressed by IEC 62977-2-2 help explain why observation conditions matter. Review off-state concealment and on-state contrast together before accepting a new ink density or layer arrangement.